Imagine looking out onto your yard and being greeted by perfectly manicured lawn mower stripes. It’s a sight that instantly adds elegance and sophistication to your outdoor space. But how can you achieve those beautiful stripes on your own yard? In this article, we will guide you through the simple steps to create those eye-catching patterns with your lawn mower. Get ready to turn your ordinary yard into a stunning masterpiece that will impress everyone who sees it.
Choosing the Right Lawn Mower
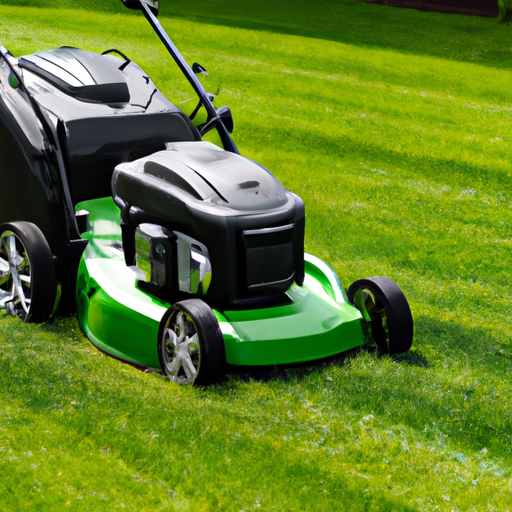
When it comes to creating beautiful lawn mower stripes, one of the first things to consider is choosing the right lawn mower. There are several types of lawn mowers available, including push mowers, self-propelled mowers, and riding mowers. Each type has its own advantages and considerations to keep in mind.
If you have a small yard and enjoy getting some exercise while mowing your lawn, a push mower may be the best option for you. These mowers are typically lightweight and easy to maneuver, making them ideal for smaller spaces. On the other hand, if you have a larger yard or prefer a more effortless mowing experience, a self-propelled or riding mower may be the better choice.
Another factor to consider is the cutting width and height of the mower. The cutting width refers to the size of the blade and determines how much grass the mower can cut with each pass. A wider cutting width can help reduce the time and effort needed to create stripes. Additionally, you’ll want to make sure the mower offers adjustable cutting height options, as this will allow you to achieve the desired length of grass for your stripes.
Finally, don’t forget to check the weight and maneuverability of the mower. You’ll want a mower that is easy to control and navigate around your yard, especially when creating intricate stripe patterns. Consider the terrain of your yard and any potential challenges you may encounter, such as slopes or uneven surfaces. Choosing a mower that is lightweight and maneuverable will make the striping process much smoother and more enjoyable.
Preparing Your Yard
Before you can start creating beautiful lawn mower stripes, it’s important to prepare your yard properly. Clearing the yard of debris and obstacles is the first step. Remove any sticks, rocks, or other objects that could interfere with the mowing process. This will ensure a smooth and uninterrupted mowing experience.
Next, it’s crucial to mow the grass at the appropriate height. The height of the grass will depend on personal preference and the type of grass you have in your yard. However, as a general rule of thumb, it’s best to mow the grass to a height of approximately one-third of its total length. This will promote healthy growth and make it easier to achieve crisp, defined stripes.
Additionally, it’s a good idea to water the lawn prior to striping. Moisture helps the grass blades to stand upright, making them more receptive to the weight of the mower and enhancing the stripe effect. Make sure to water the lawn thoroughly, allowing the water to penetrate the soil.
Creating a Plan for Lawn Mower Stripes
Before you dive into striping your entire yard, it’s helpful to have a plan in place. Decide on the desired stripe pattern you want to create. Popular options include straight, parallel stripes or diagonal patterns for a unique look. Consider what will complement the shape and size of your yard.
Next, measure the dimensions of your yard. This will allow you to accurately determine the length and width of your stripes. Take into account any irregularities or obstacles in your yard that may affect the striping process. Once you have the measurements, sketch the stripe pattern on paper to visualize how it will look in your yard.
Having a plan and a clear vision before you begin will save you time and effort in the long run. It will also ensure that your striping results in aesthetically pleasing and professional-looking lawn patterns.
Setting Up the Equipment
Once you have your plan in place, it’s time to set up the equipment. Depending on the type of mower you have, you may need to attach a striping kit or roller to the mower. These attachments help to create the desired stripe effect by bending the grass blades in opposite directions. Follow the manufacturer’s instructions for attaching the striping kit or roller securely to your specific mower model.
Next, adjust the blade height to your desired cutting level. This will determine the length of the grass and ultimately the visibility of your stripes. Experiment with different blade heights to find the one that suits your preferences.
Lastly, ensure that your lawn mower is in good working condition. Check the oil, fill the gas tank, and inspect the blades for any damage or dullness. A well-maintained mower will not only create better stripes but also ensure a safe and efficient mowing experience.
Techniques for Mowing Stripes
Now that you have all the necessary equipment set up, it’s time to get mowing! When starting a new stripe pattern, begin with a straight edge or reference point in your yard. This could be a walkway, driveway, or the edge of a flower bed. Mow parallel to this edge for your first stripe. This will help you stay aligned and create straight and even stripes.
To maintain consistency, mow parallel to the first stripe for each subsequent pass. Overlap each pass slightly to ensure that no grass is left uncut. This overlapping technique will give your stripes a seamless and professional appearance.
Maintaining Consistency with Turns
As you mow, you’ll need to navigate turns and corners in your yard. To maintain consistency, use a consistent turning technique. Practice turning on a small section of the yard first to get the hang of it. Making gradual turns at the end of each stripe will help you avoid creating curved or uneven lines.
Remember to take it slow and steady when turning, especially if you are using a riding mower. Abrupt or jerky movements can result in wavy stripes or even damage to your yard. Practice makes perfect, so don’t be discouraged if your first attempts at turning are less than ideal.
Achieving Deep and Vibrant Stripes
If you want to take your lawn mower stripes to the next level, there are a few techniques that can help you achieve deep and vibrant stripes. One effective method is to alternate the direction of the stripes with each mowing session. This will prevent the grass from leaning in one direction and ensure that your stripes stand out.
Mowing at a slower pace can also increase the pressure applied to the grass blades, resulting in more defined stripes. Experiment with different speeds to find the right balance between maintaining control and achieving a deep stripe effect.
Lastly, it’s essential to ensure that your grass is healthy and nourished. Proper lawn care, including regular watering and fertilization, will promote strong and vibrant grass blades. Healthy grass is more responsive to the weight of the mower and will enhance the overall appearance of your stripes.
Dealing with Challenges and Obstacles
Creating lawn mower stripes can sometimes be challenging, especially when dealing with obstacles such as trees, flower beds, or other features in your yard. When navigating around these obstacles, take your time and exercise caution to avoid damaging them or your mower.
In some cases, creating curved stripes may be necessary for irregular-shaped yards. This can add a unique and visually appealing element to your lawn. To create curved stripes, simply adjust your mowing direction gradually as you move along, following the natural shape of your yard.
If possible, remove or temporarily relocate any obstacles that may obstruct your striping process. This will allow for a smoother and more uninterrupted mowing experience. However, always prioritize the well-being and preservation of your landscaping features over creating stripes.
Finishing Touches
Once you have completed mowing your lawn and creating beautiful stripes, it’s time for the finishing touches. Trim the edges of your lawn for a clean and polished appearance. This will give your yard a professional-looking finish and make your stripes stand out even more.
It’s important to note that mowing stripes should be done when the grass is dry. Mowing wet grass can result in clumping and uneven cutting, which will diminish the quality of your stripes. Wait for a dry day or schedule your mowing accordingly to ensure the best results.
Lastly, regularly maintaining your lawn will ensure the longevity of your stripes. Keep up with mowing, watering, and fertilizing on a consistent basis. This will promote healthy grass growth and preserve the vibrancy of your stripes throughout the season.
Inspiring Ideas for Lawn Mower Stripes
Creating lawn mower stripes allows for endless creativity and experimentation. Once you have mastered the basics, don’t be afraid to try different stripe patterns to add a unique touch to your yard. Diagonal or checkerboard designs can create a visually striking effect and make your lawn stand out.
For an even more eye-catching appeal, consider incorporating contrasting grass types. Planting different grass varieties or using turf paint to create distinct sections can add depth and visual interest to your stripes. Let your imagination run wild and have fun with creating patterns that reflect your personal style and taste.
In conclusion, creating beautiful lawn mower stripes is an art that requires careful planning, proper equipment, and attention to detail. By considering the type of mower, preparing your yard, creating a plan, and following proven techniques, you can achieve stunning and professional-looking stripes on your lawn. Remember to maintain your lawn regularly and explore different stripe patterns to keep your yard looking fresh and vibrant. With a little practice and creativity, you’ll be able to transform your yard into a work of art that will impress all who see it.